Working with Cuts
If you have been scrapbooking for a long time, you may have some fancy punches or cutters in your craft room. Artisan gives you a collection of cutters that you can use on elements that are already placed on your page.

Just like your steel craft room cutters, Artisan's cutters can be taken out and put away. But unlike physical cutters, if you make a "bad" cut you can cancel out and do it over!
You can make the following cut types in Artisan:
- How to Cut a Straight Line
- How to Cut Shapes
- How to Cut a Text Outline
- How to Make a Custom Cut
- How to Cut Corners
- How to Make Grid Cuts
Selecting an Element to Cut
Before you apply a cut of course, you first must select the element to cut. But not all selecting is created equal! In addition to specialized cutters, Artisan equips you with selection tools so you can get pretty detailed with applying custom cuts.
How to Select
How to use each selecting tool is described in the diagrams below.
| Selection Tool | Description |
|---|---|

|
Allows you to choose a shape for your selection.
|

|
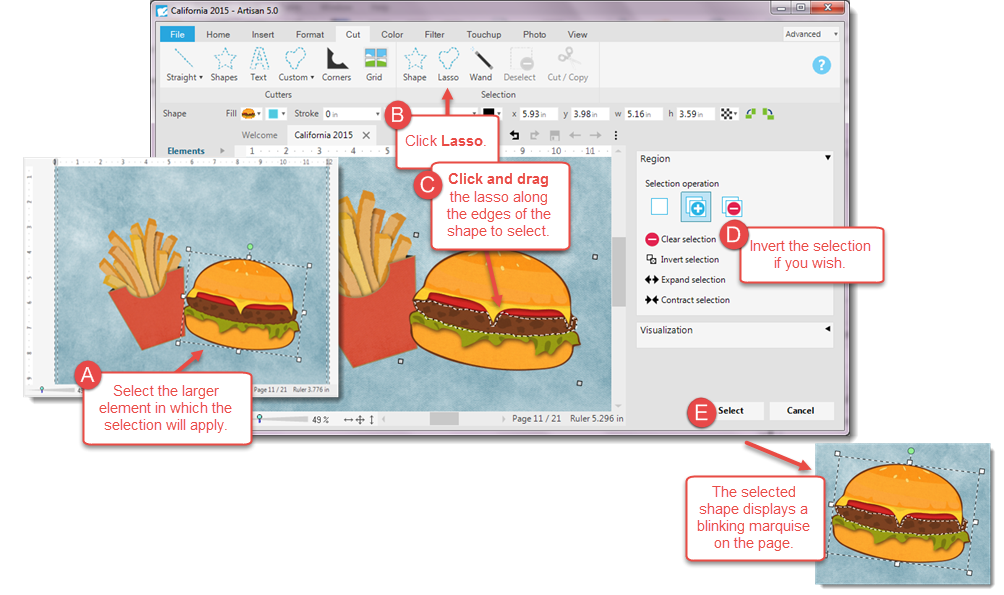
Allows you to meticulously trace your selection.
|

|
Selects like-objects within your selection. It is a quick way to select around a jagged-edged element, as you will not have to meticulously trace the edge.
|

|
Allows you to deselect a selection attempt. Use this option to try the selection again if it did not turn out as expected. |

Note: Once you have completed your selection, you can use the Cut/Copy tool to apply a cut.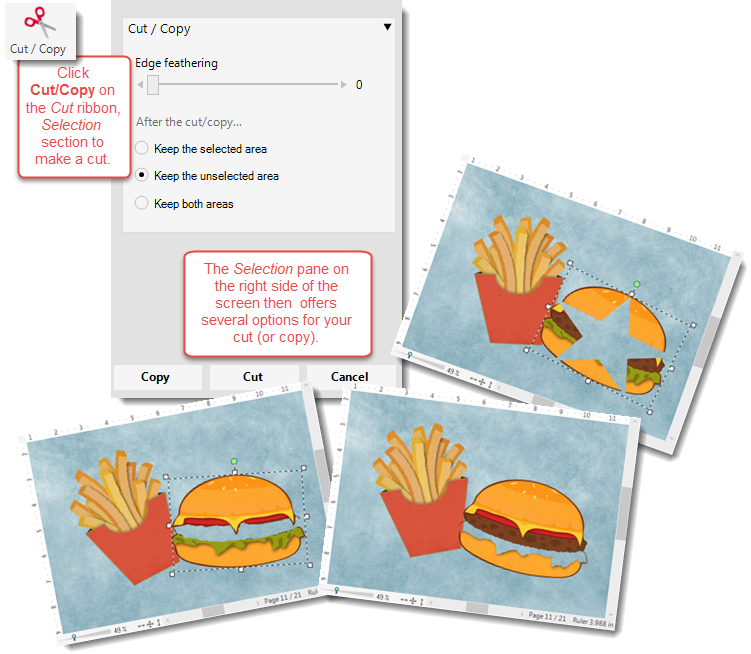
How to Cut a Straight Line
- Select the element that you want to cut (embellishment, photo, or shape).

- From the Cut ribbon, click

- Click on a straight cut sub-menu and select the desired options.
| Option | Description |
|---|---|
| Straight Edge | Cuts a straight edge across the element. You can choose which part of the element remains on the page.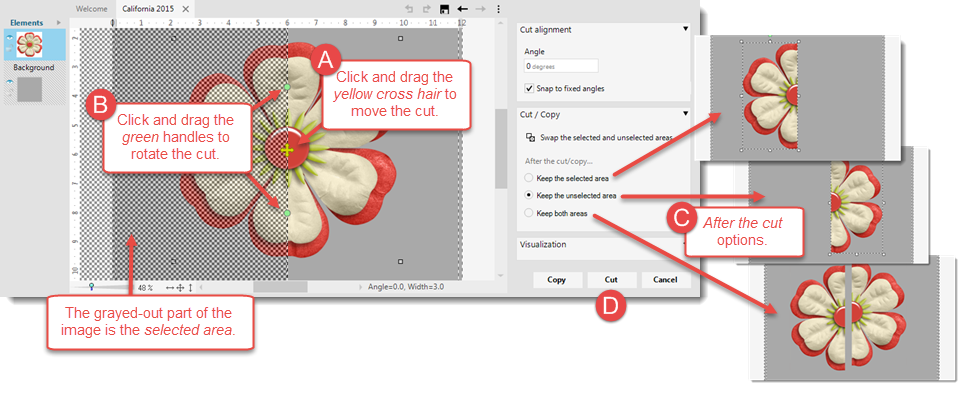 |
| Blended Edge | Cuts a blended edge across the element. You can choose which part of the element remains on the page.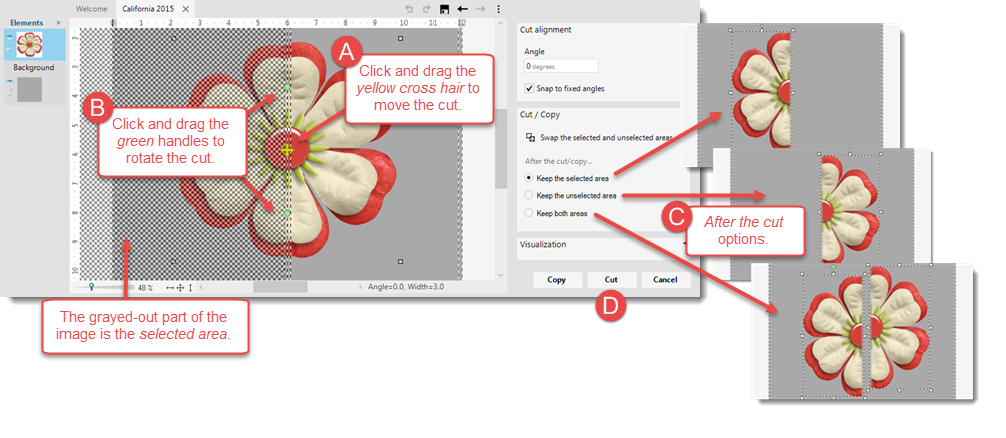 |
| Paper Rip | Cuts a ripped edge across the element with both parts of the element remaining on the page.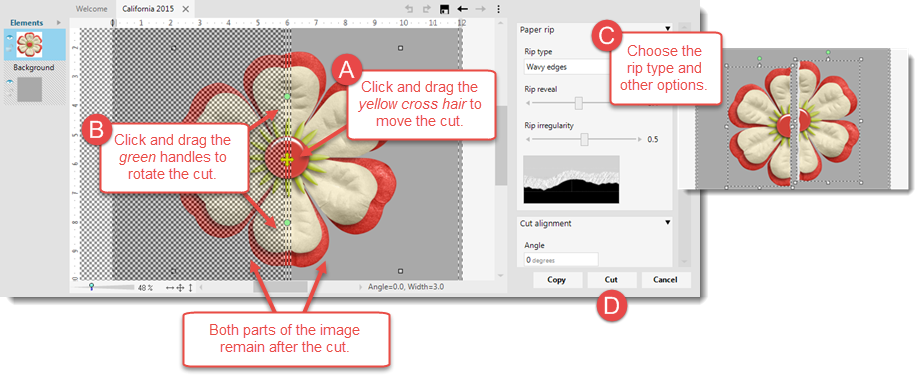 |
| Shaped Edge | Cuts a shaped edge of your choosing across the element with both parts of the element remaining on the page.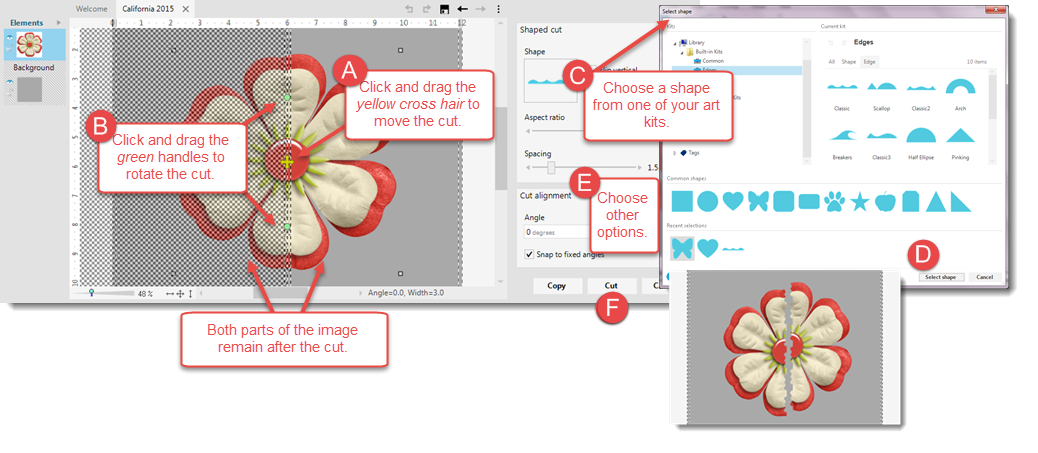 |
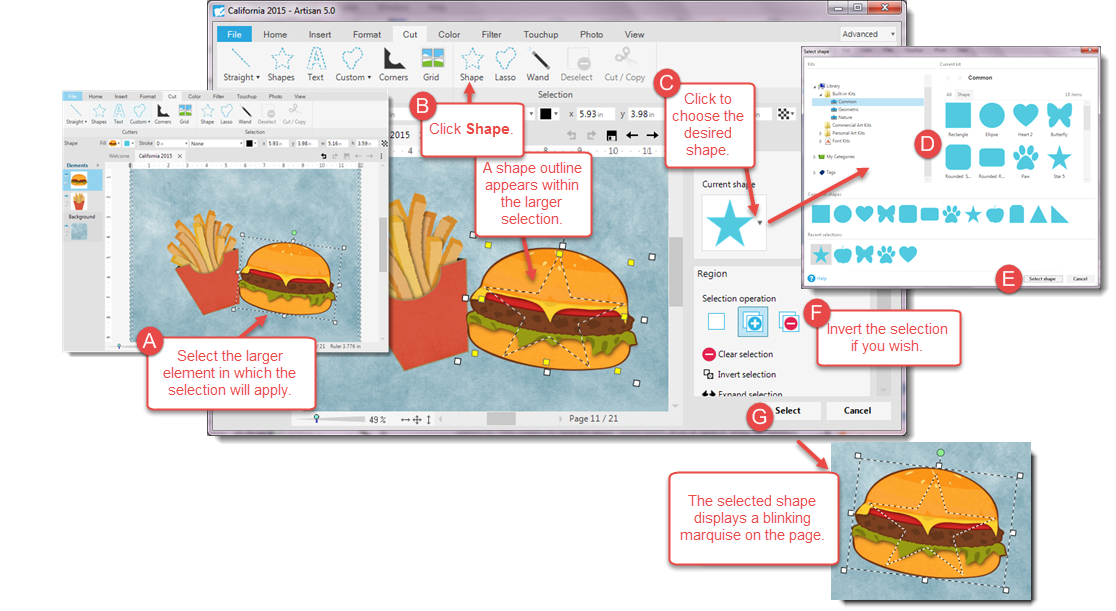
How to Cut Shapes
- Select the element that you want to cut (embellishment, photo, or shape).

- From the Cut ribbon, click
 .
.
The Cut Shapes pane opens.
- Follow the steps in the diagram above to complete your cut.

How to Cut a Text Outline
- Select the element that you want to cut (embellishment, photo, or shape).

- From the Cut ribbon, click
 .
.
The Cut Text pane opens.
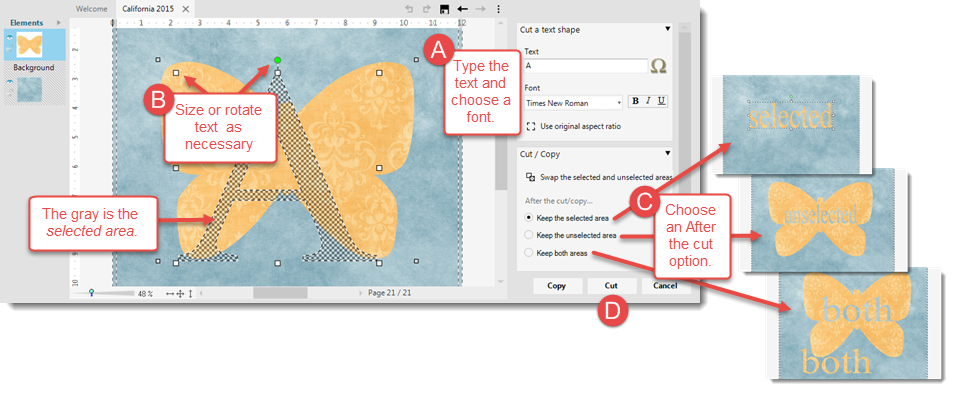
Note: You may be prompted to flatten the image. If so, click OK. See Arranging Elements on a Page for more information.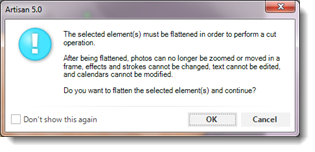
- Follow the steps in the diagram below to complete your cut.
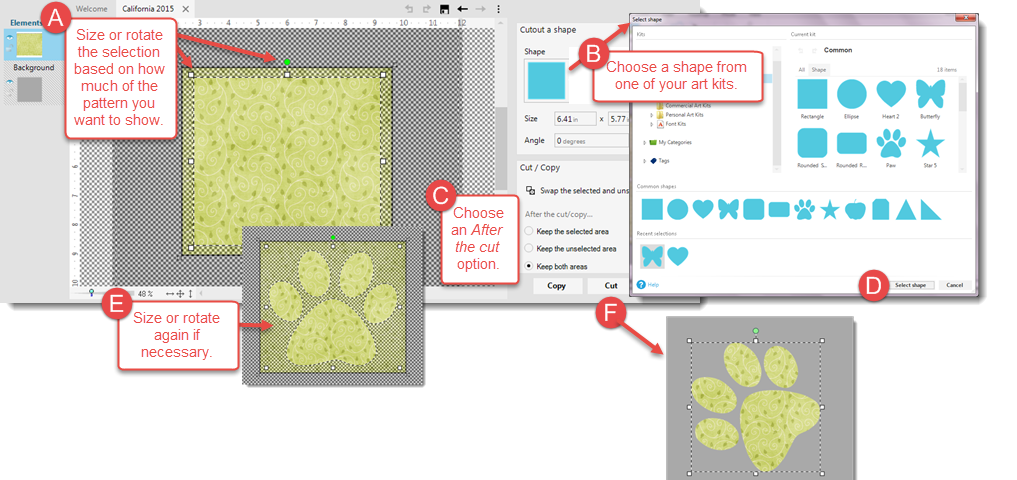
How to Make a Custom Cut
The Custom Cutter allows you to create your own shape or trace around an existing shape. Use it to trace a silhouette or outline an element of photo.
To make a custom cut, follow these steps:
- Select the element that you want to cut (embellishment, photo, or shape).

- From the Cut ribbon, click
 .
. - Click on a straight cut sub-menu and select a sub menu option and follow the instructions in the diagrams below.
| Sub menu | Description |
|---|---|
| Cut out a straight path |
Allows you to draw a shape using straight lines to "connect the dots." 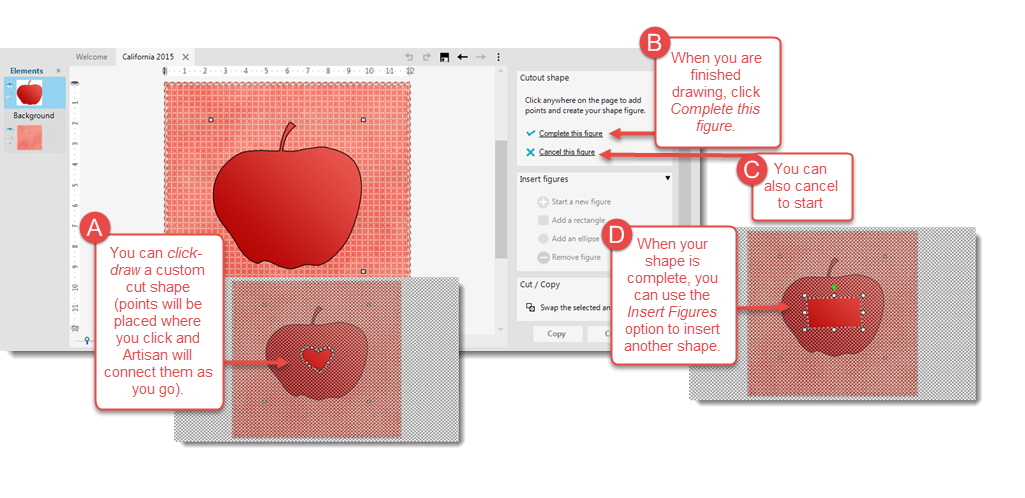 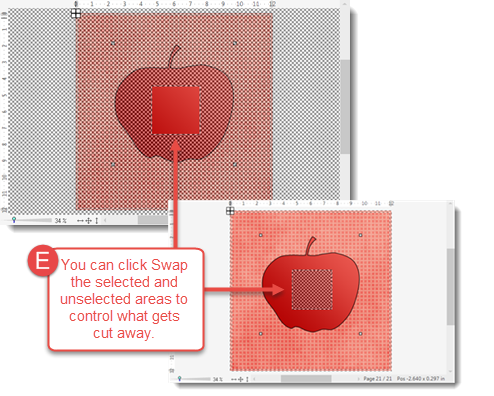 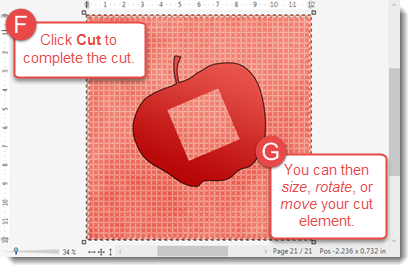 |
| Cut out a curved path |
Allows you to draw a shape using curved lines to "connect the dots." 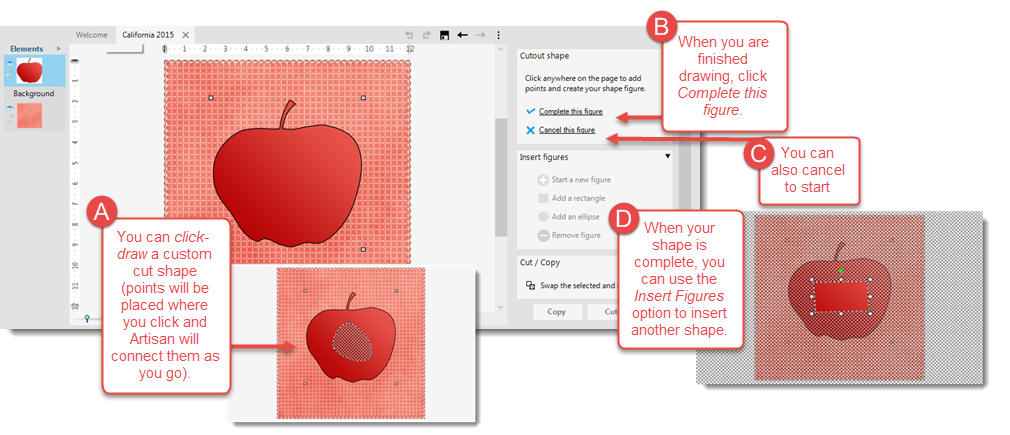 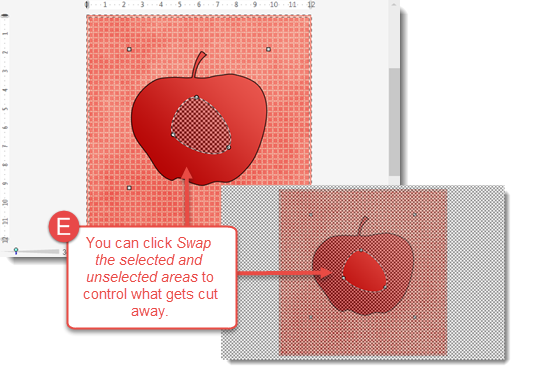 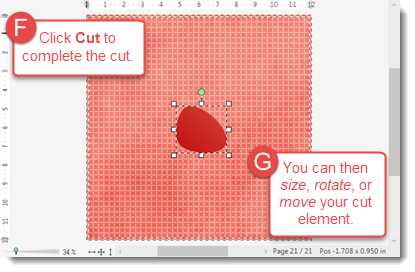 |
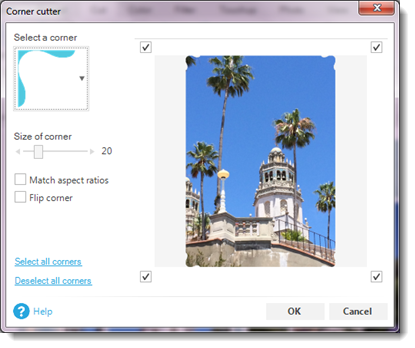
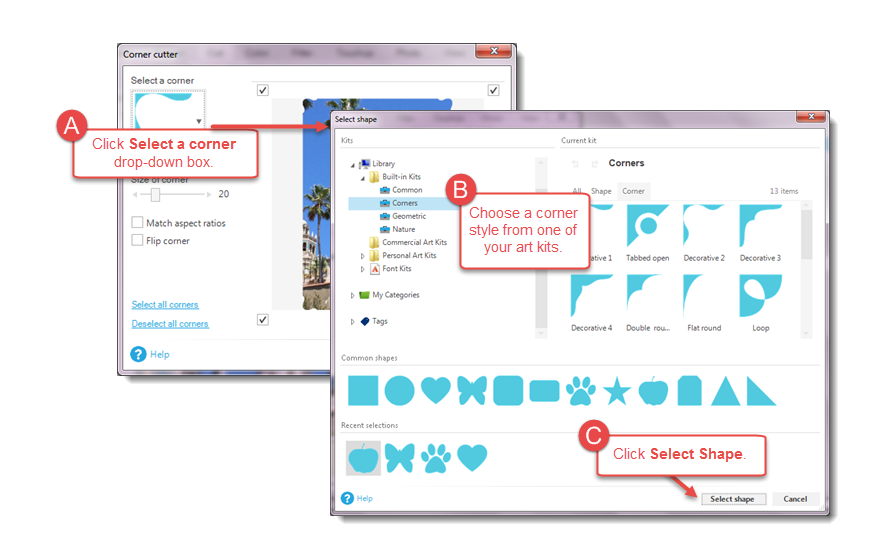
How to Cut Corners
The Corners cutter allows you to "snip" the corners of photos using different style cuts, as if you were attaching them to a physical page. You can use this feature on any element.
To cut corners on a photo follow these steps:
- Select the element that you want to cut (embellishment, photo, or shape).

- From the Cut ribbon, click
 .
.
The Cut Corners pane opens.
- Follow the steps in the diagram below to complete your cut.

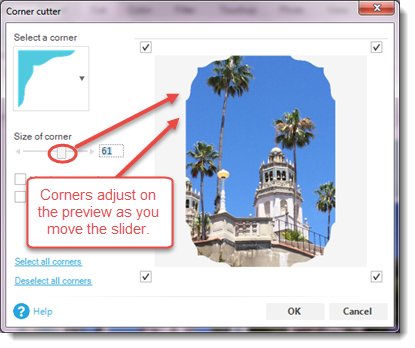
The selected corner appears.
- Click and drag the Size of corner slide bar to the desired size (watch preview to observe your adjustment).

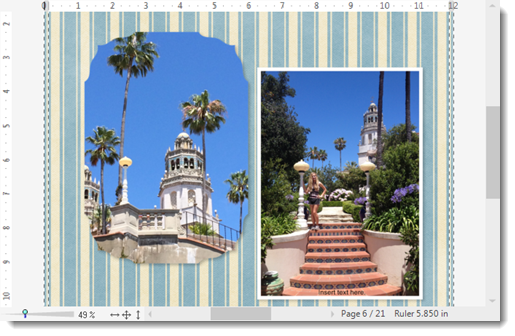
- Click OK.
The corner cuts are applied to the photo on the page.


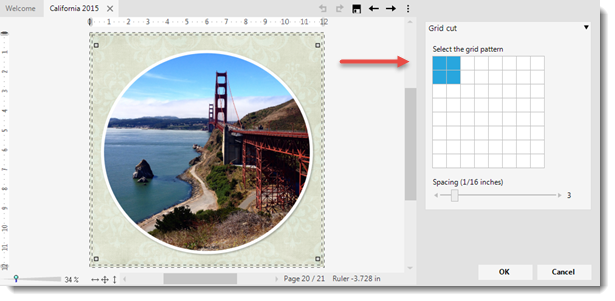
How to Make Grid Cuts
The Grid cutter allows you to slice an element into equally-sized squares. This feature creates a stunning effect on photos, but like all cutters can be used on any element.
To make a grid cut, follow these steps:
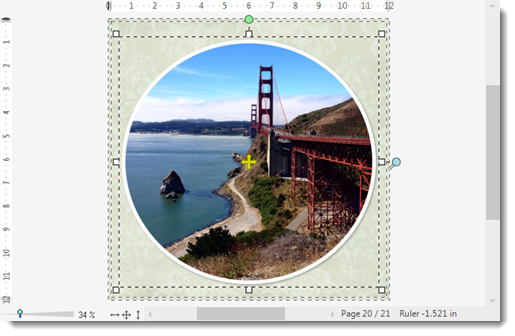
- Select the element that you want to cut (embellishment, photo, or shape).

- From the Cut ribbon, click
 .
.
The Cut Grid pane opens.
- Follow the steps in the diagram below to complete your cut.
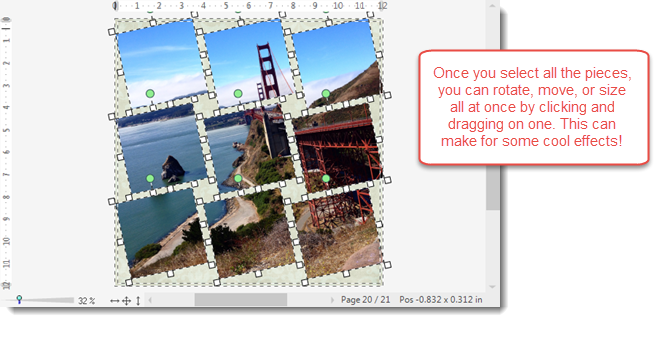
The photo is sliced into a grid on the page.
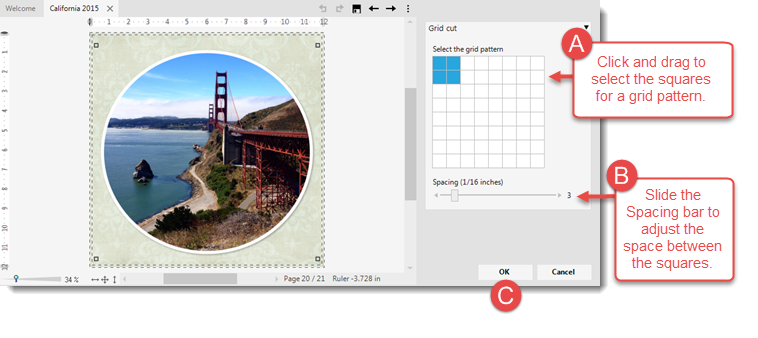
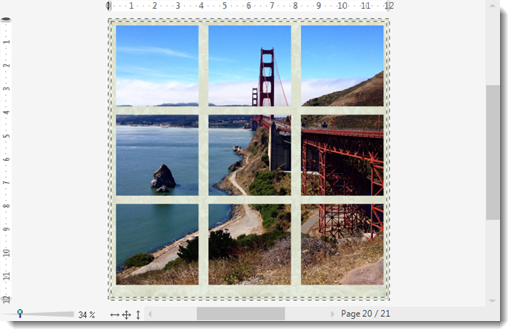
Note: When working with grid cuts, Artisan will convert the photo frame to either a square or rectangle, depending on the grid pattern you choose.
Also, each slice is now a separate element. If you decide you want to move or size the pieces together, you can use your SHIFT key to multi-select all the pieces.